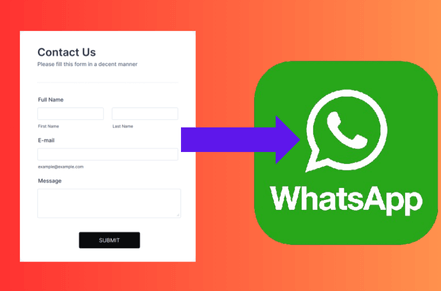
In the ever-evolving world of web development, one challenge that frequently arises is the need to send data from an HTML form directly to WhatsApp. For web developer Anand Chaursiya, integrating such a feature can streamline communication and enhance user experience. This comprehensive guide will walk you through the steps to achieve this, ensuring your process is smooth and effective.
Understanding the Basics
Before diving into the technical details, it’s essential to understand why you might want to send data from an HTML form to WhatsApp. WhatsApp is a widely used messaging platform with over 2 billion users worldwide. Integrating your HTML form with WhatsApp can provide instant communication, reduce response times, and improve customer satisfaction.
Prerequisites
- Basic Knowledge of HTML and JavaScript: You should be comfortable with HTML and JavaScript to follow this guide.
- WhatsApp Account: Ensure you have an active WhatsApp account.
- Web Development Environment: Set up your preferred code editor and local server.
Step-by-Step Guide
How to Send Data From HTML Form to WhatsApp
1. Create an HTML Form
First, create a simple HTML form. This form will collect user data that you want to send to WhatsApp.
					<!DOCTYPE html>
<html lang="en">
<head>
    <meta charset="UTF-8">
    <meta name="viewport" content="width=device-width, initial-scale=1.0">
    <title>Send Data From HTML Form to WhatsApp</title>
</head>
<body>
    <form id="contactForm">
        <label for="name">Name:</label>
        <input type="text" id="name" name="name" required><br><br>
        <label for="email">Email:</label>
        <input type="email" id="email" name="email" required><br><br>
        <label for="message">Message:</label>
        <textarea id="message" name="message" required></textarea><br><br>
        <button type="button" onclick="sendDataToWhatsApp()">Submit</button>
    </form>

    <script src="script.js"></script>
</body>
</html>
2. Write JavaScript to Handle Form Submission
Next, create a JavaScript file named script.js. This script will handle the form submission and format the data to be sent via WhatsApp.
					function sendDataToWhatsApp() {
    const name = document.getElementById('name').value;
    const email = document.getElementById('email').value;
    const message = document.getElementById('message').value;

    const whatsappMessage = `Name: ${name}\nEmail: ${email}\nMessage: ${message}`;

    const whatsappNumber = 'your-whatsapp-number'; // Enter the WhatsApp number with country code
    const whatsappUrl = `https://api.whatsapp.com/send?phone=${whatsappNumber}&text=${encodeURIComponent(whatsappMessage)}`;

    window.open(whatsappUrl, '_blank');
}
3. Testing the Integration
Save your HTML and JavaScript files, and open the HTML file in a web browser. Fill out the form and click the “Submit” button. The WhatsApp web application should open with your pre-filled message.
To make this process more user-friendly, consider the following enhancements:
Validate Form Data
Ensure all fields are filled out correctly before allowing the form to be submitted.
					function sendDataToWhatsApp() {
    const name = document.getElementById('name').value;
    const email = document.getElementById('email').value;
    const message = document.getElementById('message').value;

    if (!name || !email || !message) {
        alert('Please fill out all fields.');
        return;
    }

    const whatsappMessage = `Name: ${name}\nEmail: ${email}\nMessage: ${message}`;
    const whatsappNumber = 'your-whatsapp-number';
    const whatsappUrl = `https://api.whatsapp.com/send?phone=${whatsappNumber}&text=${encodeURIComponent(whatsappMessage)}`;

    window.open(whatsappUrl, '_blank');
}
Provide Feedback
Let users know their data has been successfully sent.
					window.open(whatsappUrl, '_blank');
alert('Your message has been sent via WhatsApp!');
Using WhatsApp API for Business
For more advanced features, consider using the WhatsApp Business API. This requires a WhatsApp Business account and can offer more control and automation over your messages.
					// Example using WhatsApp Business API
const apiUrl = 'https://your-api-endpoint.com/sendMessage';
const payload = {
    phone: whatsappNumber,
    body: whatsappMessage
};

fetch(apiUrl, {
    method: 'POST',
    headers: {
        'Content-Type': 'application/json'
    },
    body: JSON.stringify(payload)
}).then(response => {
    if (response.ok) {
        alert('Message sent successfully!');
    } else {
        alert('Failed to send message.');
    }
});
6. Security Considerations
When sending data from an HTML form to WhatsApp, ensure you handle user data responsibly. Avoid sending sensitive information and always inform users about how their data will be used.
- WhatsApp Not Opening: Ensure the WhatsApp URL is correctly formatted and the phone number includes the country code.
- Form Not Submitting: Check your JavaScript console for errors and ensure all form fields are correctly referenced.
Conclusion
How to Send Data From HTML Form to WhatsApp
Integrating an HTML form to send data to WhatsApp is a practical solution for instant communication. For web developer Anand Chaursiya, this process involves creating an HTML form, writing JavaScript to handle form submission, and ensuring the data is sent correctly to WhatsApp. By following the steps outlined in this guide, you can enhance your web applications and provide a seamless user experience. How to Send Data From HTML Form to WhatsApp
Recap of Keywords
Throughout this guide, we focused on how to send data from an HTML form to WhatsApp, emphasizing keywords like web developer Anand Chaursiya, send data from HTML form to WhatsApp, HTML form data to WhatsApp, send form data via WhatsApp, HTML form WhatsApp integration, WhatsApp message from HTML form, and submit HTML form to WhatsApp. By mastering these techniques, you can improve your web development skills and offer valuable functionality to your users.

